Why Tiramisu Cake Wins Every Dessert Table
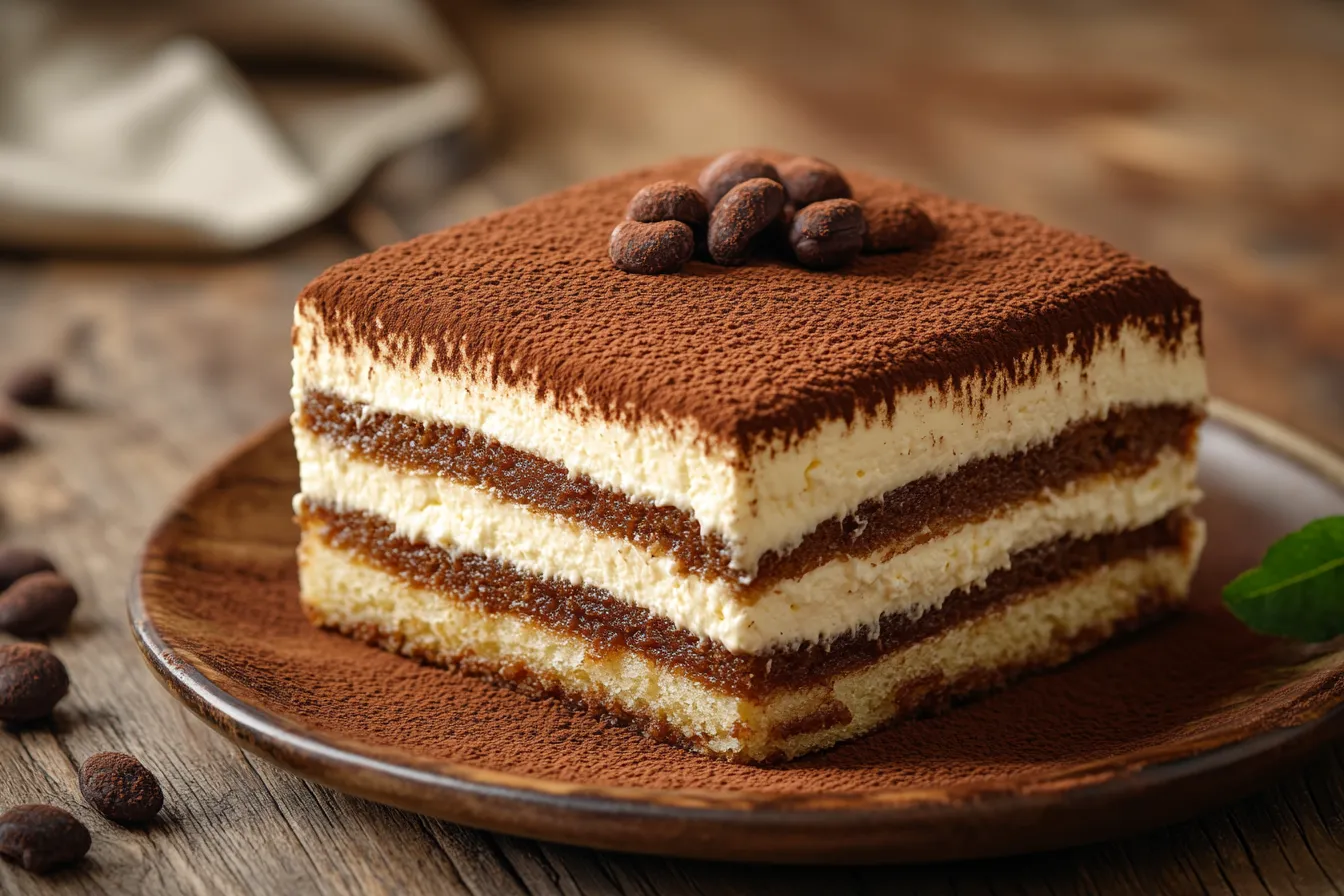
If you’re searching for a dessert that turns heads before the first bite, Tiramisu Cake is it. This show-stopping treat takes the elegance of the classic Italian tiramisu and transforms it into a layered cake masterpiece. Think fluffy sponge, velvety mascarpone cream, and rich coffee essence—every forkful a perfect harmony of textures and flavors. Unlike your everyday chocolate or vanilla cake, this beauty doesn’t just satisfy your sweet tooth—it delivers an experience. Whether it’s a holiday dinner, birthday celebration, or a casual weekend indulgence, it effortlessly steals the spotlight.
Looking for inspiration? Try this Oreo Ice Cream Sandwich Recipe for another crowd-pleasing dessert idea.
A Quick Look at Tiramisu’s Italian Roots and Modern Twist
The word “tiramisu” literally means pick me up in Italian—a nod to its energizing coffee base and uplifting flavor. While the original dessert is traditionally served in a dish, the cake version brings a layered, sliceable format that’s ideal for parties and special gatherings. Instead of ladyfingers, we use moist sponge cake layers that absorb coffee without turning soggy, holding up beautifully under thick, creamy mascarpone filling. And the dusting of cocoa on top? That’s not just garnish—it’s tradition, charm, and flavor in one.
In this guide, you’ll learn everything from selecting top-notch ingredients to achieving the perfect creamy consistency, plus insider tricks for presentation that will make your Tiramisu Cake look as irresistible as it tastes.
Must-Have Ingredients for Tiramisu Cake
The Core Ingredients That Create That Signature Flavor
A Tiramisu Cake is only as good as what you put into it. The magic lies in quality—every element plays a role in building depth and balance. Here’s what you’ll need:
For the Sponge Cake Base
- All-purpose flour – gives structure without making the cake heavy.
- Eggs – whip them for maximum volume and lightness.
- Sugar – for sweetness and moisture retention.
- Baking powder – ensures the cake rises evenly.
For the Coffee Soak
- Freshly brewed espresso or strong coffee – the heart of tiramisu’s flavor.
- Sugar – optional, depending on how sweet you like it.
- Vanilla extract – softens the coffee’s bitterness.
For the Mascarpone Cream Filling
- Mascarpone cheese – rich, creamy, and slightly tangy.
- Heavy cream – whipped to cloud-like peaks for lightness.
- Sugar – balances the creaminess with just enough sweetness.
- Egg yolks – traditional in tiramisu for richness (can be omitted for egg-free).
For Topping
- Unsweetened cocoa powder – that iconic, slightly bitter finish.
- Chocolate shavings – optional but elevates presentation.
How to Choose the Best Coffee, Cocoa, and Mascarpone
The flavor profile of your Tiramisu Cake is directly linked to the quality of these three stars:
Coffee: Choose a fresh, dark roast for deep flavor. If you don’t have an espresso machine, a moka pot or French press can give you strong, aromatic coffee. Instant coffee is possible, but fresh brew wins every time.
Cocoa Powder: Opt for high-quality Dutch-processed cocoa for a smoother, less acidic taste. It will also give your cake a deeper, richer color.
Mascarpone Cheese: Always buy fresh, full-fat mascarpone. It should be creamy, smooth, and mild—not grainy or overly tangy.
Discover great ideas like this Creamy Cottage Cheese Chocolate Mousse if you love rich, creamy desserts with a twist.
Preparing the Perfect Cake Base
Step-by-Step Guide to a Moist and Fluffy Sponge
The sponge cake is the backbone of your Tiramisu Cake, and it needs to be airy enough to soak up coffee while sturdy enough to hold the creamy layers. Here’s the method that gets it right every time:
1. Preheat & Prep
Preheat the oven to 350°F (175°C). Lightly grease and line two 8-inch round cake pans with parchment paper for effortless release.
2. Whip the Eggs and Sugar
In a large mixing bowl, beat 4 large eggs with 1 cup granulated sugar on high speed for 5–7 minutes. You’re looking for a pale, thick mixture that falls in ribbons when lifted. This step traps air for that signature fluffy texture.
3. Sift and Fold in Dry Ingredients
In a separate bowl, sift together 1 cup all-purpose flour and 1½ teaspoons baking powder. Gently fold into the egg mixture using a spatula—don’t overmix or you’ll lose the air you just whipped in.
4. Add the Moisture
Mix in ¼ cup milk and 1 teaspoon vanilla extract, folding gently until just combined.
5. Bake to Perfection
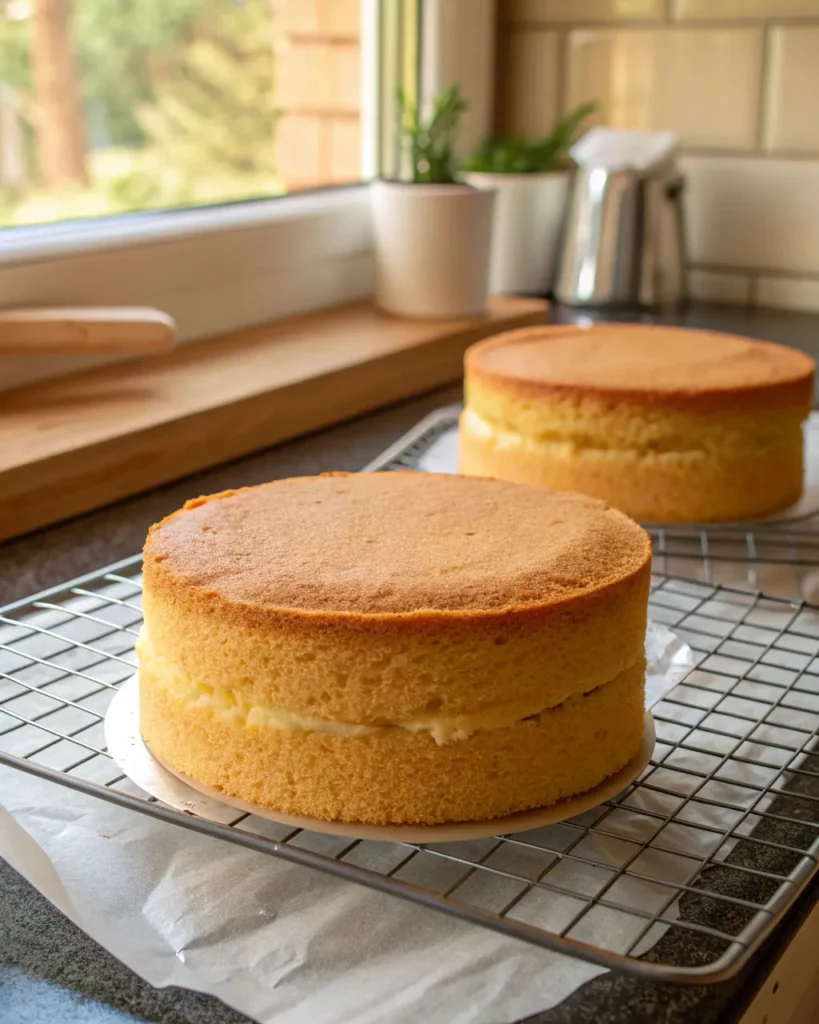
Pour the batter evenly into the two pans and bake for 18–20 minutes, or until a toothpick inserted in the center comes out clean.
6. Cool Completely
Allow the cakes to cool in their pans for 10 minutes, then transfer them to a wire rack to cool fully before assembling. Assembling while warm can melt the mascarpone filling, so patience is key.
Baking Mistakes to Avoid for a Light Texture
- Skipping the sifting: This causes lumps and dense spots.
- Overmixing: It deflates the batter, leading to a flat, tough cake.
- Opening the oven too soon: This can cause your sponge to collapse.
- Not cooling completely: Warm cake layers can turn the cream runny.
With this base ready, you’re halfway to a dessert that will turn heads. Next, we’ll get into the luxurious filling that makes Tiramisu Cake unforgettable.
Making the Creamy Mascarpone Filling
How to Achieve the Perfect Silky Consistency
The mascarpone cream is the soul of a Tiramisu Cake—rich, smooth, and lightly sweet with just enough coffee essence to make each bite memorable. To get that professional, velvety texture, follow this process:
1. Whip the Cream
In a chilled mixing bowl, whip 1½ cups heavy cream until soft peaks form. Keep the cream cold so it whips faster and holds better. Set aside.
2. Blend the Mascarpone
In another bowl, gently beat 16 ounces mascarpone cheese with ½ cup granulated sugar until just combined. Overbeating mascarpone can cause it to separate, so keep it slow and gentle.
3. Add Flavor
Mix in 1 teaspoon vanilla extract and 2–3 tablespoons strong brewed coffee or espresso. This gives the cream a subtle coffee aroma without overpowering it.
4. Fold It Together
Carefully fold the whipped cream into the mascarpone mixture in small portions, using a spatula and a gentle touch to keep the airy texture. The mixture should end up smooth, fluffy, and stable for spreading.
Balancing Sweetness With the Coffee Kick
One of the most common mistakes in making Tiramisu Cake cream is overloading it with sugar, which can mask the coffee’s depth. The trick is balance:
- Taste the mixture before the final fold.
- Add sugar in small amounts if you want more sweetness.
- Use freshly brewed espresso rather than instant for a cleaner, less bitter flavor.
Pro tip: If you like a slightly stronger coffee flavor, brush a thin layer of coffee directly onto the sponge just before spreading the cream—it deepens the taste without making it soggy.
Assembling the Layers Like a Pro
How to Soak Without Over-Saturating the Cake
The coffee soak is where the magic happens—but it’s also where many home bakers go wrong. Too much liquid turns the sponge mushy, while too little makes it dry.
Here’s the perfect method:
- Make the Soak: Combine 1 cup freshly brewed espresso or strong coffee with 2 tablespoons sugar and 1 teaspoon vanilla extract. Let it cool to room temperature.
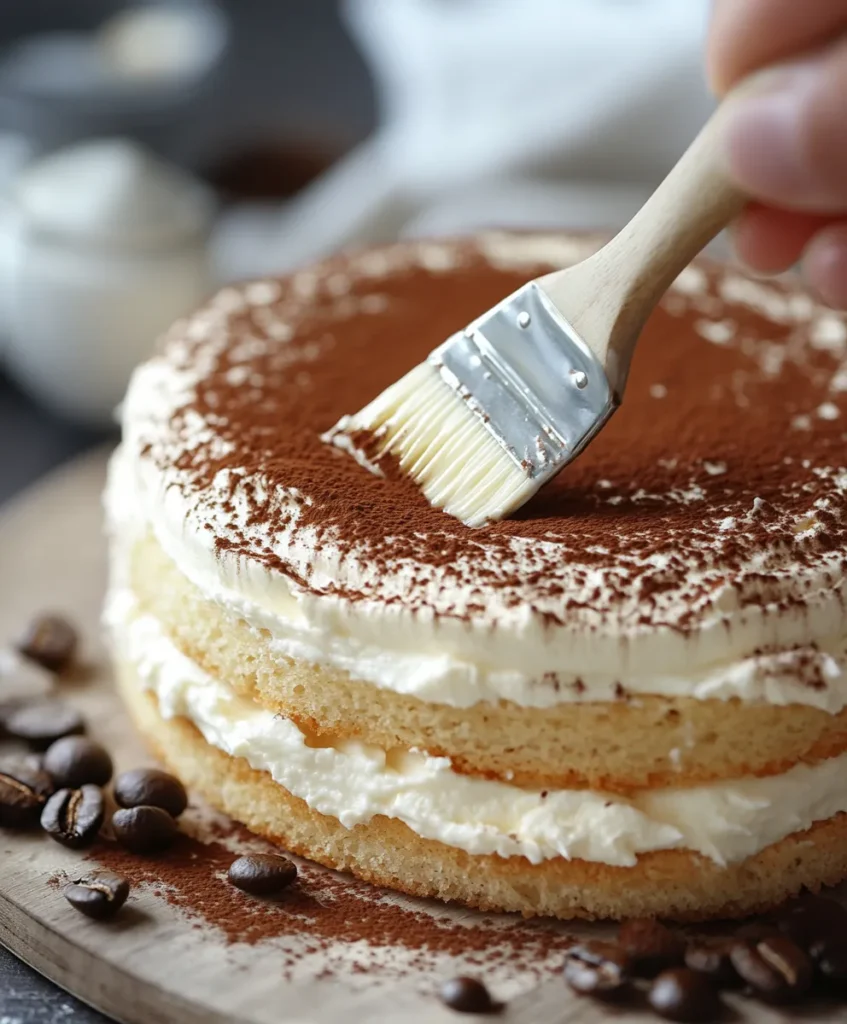
- Brush, Don’t Pour: Use a pastry brush to lightly coat the top of each cake layer. Work slowly so the coffee penetrates without pooling.
- Even Distribution: Aim for an even, light saturation. The sponge should feel moist but still firm when touched.
Layering for Both Visual Appeal and Taste
A Tiramisu Cake isn’t just about taste—it’s about that jaw-dropping cross-section when you slice it. Here’s the step-by-step:
- First Layer: Place one cake layer on your serving plate or cake board. Spread a generous amount of mascarpone cream evenly over the top.
- Second Soak: Lightly brush the underside of the second cake layer with the coffee soak before placing it on top.
- Top Layer Cream: Spread more mascarpone cream over the second layer and around the sides if you want a frosted look.
- Cocoa Finish: Sift unsweetened cocoa powder generously over the top for that classic tiramisu presentation.
- Optional Garnish: Add chocolate curls, coffee beans, or a light dusting of grated dark chocolate for visual flair.
Pro tip: If you’re after restaurant-level presentation, chill the cake for 15 minutes after stacking, then add a final thin layer of cream and cocoa dusting before serving.
The Importance of Chilling and Setting
How Long to Chill for the Best Flavor Fusion
Tiramisu Cake isn’t a dessert you rush—it’s one you let develop. Chilling is where the coffee seeps into the sponge, the mascarpone cream sets, and every bite becomes a perfect harmony of flavors.
Minimum Chill Time: 4 hours is the absolute minimum if you’re in a hurry, but the sweet spot is overnight (8–12 hours). This patience rewards you with a cake that slices cleanly and tastes richer.
Chill Process:
- Cover the cake with plastic wrap or a cake dome to prevent it from drying out.
- Place it in the coldest part of your refrigerator, away from strong-smelling foods (mascarpone absorbs odors easily).
- Avoid moving the cake during chilling—let it rest undisturbed so the layers stay even.
Storage Tips to Maintain Freshness
- Refrigerator: Keeps fresh for up to 3–4 days if stored in an airtight container.
- Freezing: You can freeze Tiramisu Cake by wrapping slices securely in plastic wrap and placing them in a freezer-safe container. It will last for up to 2 months. Thaw overnight in the refrigerator before serving.
- Avoid Counter Storage: The mascarpone cream is dairy-based, so always keep it refrigerated.
Pro tip: Chilling not only improves flavor but also makes cutting much easier. Use a sharp, hot knife (dip in hot water and wipe dry) for neat slices every time.
Creative Tiramisu Cake Variations
Chocolate-Dream Tiramisu Cake
If you’re a chocoholic, this version is for you. Replace the traditional coffee soak with a mocha mixture—brewed coffee + hot chocolate—and fold melted dark chocolate into the mascarpone cream. Finish with chocolate ganache drizzled over the top before dusting with cocoa powder. It’s indulgence on a whole new level.
Extra Tip: Use chocolate sponge instead of plain to double down on the flavor.
Berry-Infused Tiramisu Cake for a Fresh Twist
For a lighter, fruitier version, skip the cocoa dusting and top your cake with fresh raspberries, blueberries, or strawberries. You can also add a thin layer of berry compote between the sponge and cream for a sweet-tart contrast.
Why it Works: The natural acidity of berries balances the richness of mascarpone and coffee, making it a perfect summer dessert.
Nutty Caramel Tiramisu Cake
Add a splash of caramel sauce to the coffee soak and sprinkle toasted hazelnuts or almonds between layers. This version has a delightful crunch and a deeper, nutty sweetness.
Holiday-Spiced Tiramisu Cake
Infuse your coffee soak with cinnamon, nutmeg, and a pinch of clove for a festive twist. This works beautifully for Thanksgiving, Christmas, or any cozy winter gathering.
Serving and Presentation Hacks
Plating Ideas to Wow Guests
Presentation matters almost as much as flavor—especially if you want your Tiramisu Cake to be the star of the table.
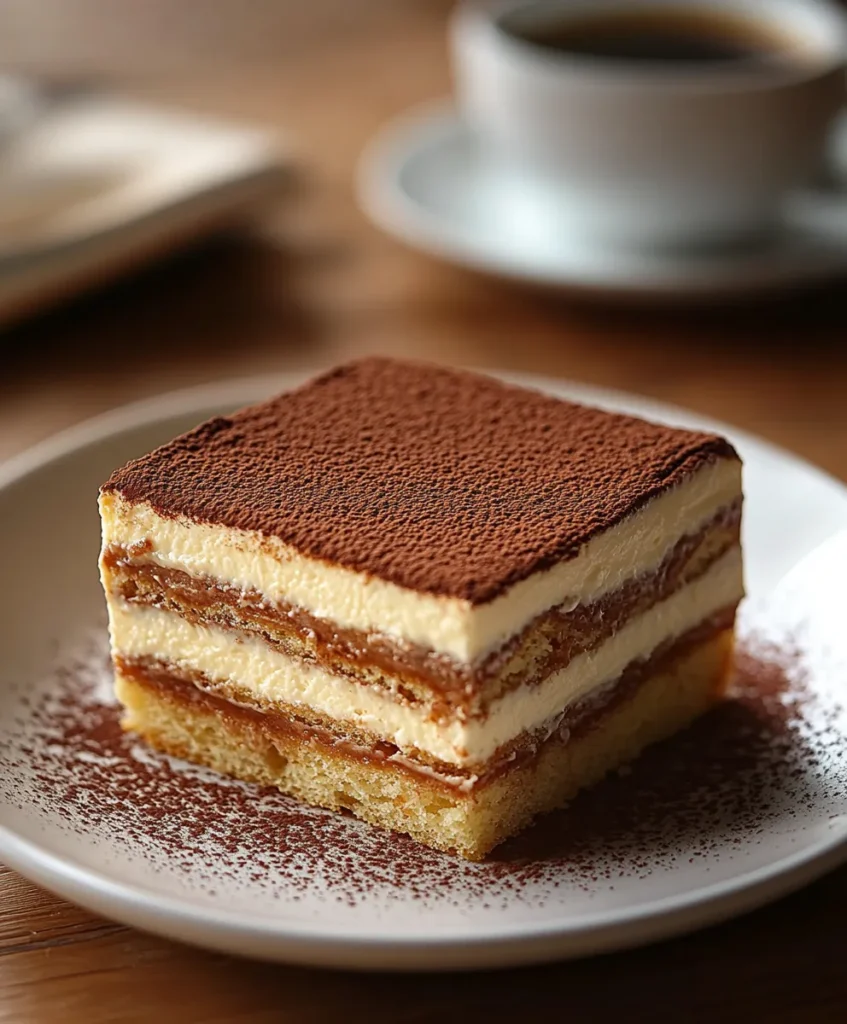
- Classic Slice: Cut neat wedges using a hot, clean knife and serve on white plates to let the cake’s layers shine.
- Garnish with Intent: Add chocolate curls, a dusting of extra cocoa powder, or a few espresso beans on the plate for elegance.
- Dessert Board Style: Serve slices alongside fresh berries, biscotti, and chocolate truffles for a luxurious dessert platter.
Pro tip: If you’re serving at a party, pre-slice the cake, slightly offset the slices, and dust with cocoa right before serving—guests will feel like they’re at a bakery display.
Pairings That Elevate the Experience
- Beverages: Espresso, cappuccino, or dessert wine like Marsala for an authentic Italian feel.
- Sides: Fresh berries or a light fruit salad to cut the richness.
- For Brunch: Serve smaller slices with a spread of pastries and coffee for an upscale morning treat.
Make it Instagram-Worthy
Lighting is everything—shoot in natural daylight, angle to capture the layers, and dust cocoa powder just before snapping the shot. A little coffee cup in the background adds an extra cozy vibe.
Storing and Make-Ahead Tips
Keeping It Fresh for Days
The creamy layers and moist sponge of a Tiramisu Cake mean it needs a little extra care to stay at its best.
- Refrigeration: Store the cake in an airtight container in the fridge for up to 3–4 days. This prevents it from absorbing other food odors while keeping the mascarpone cream firm.
- Serving After Storage: Let the cake sit at room temperature for 10–15 minutes before serving to bring out the flavors.
Freezing for Special Occasions Without Losing Flavor
Yes, you can freeze Tiramisu Cake successfully—perfect for prepping ahead of a big event.
- Slice the cake into portions.
- Wrap each slice tightly in plastic wrap, then in aluminum foil to prevent freezer burn.
- Keep in a freezer-safe container for up to 2 months.
- Thaw overnight in the fridge before serving.
Pro tip: If freezing, skip the final cocoa dusting and add it fresh after thawing for the best look and taste.
Make-Ahead Strategy for Events
For parties, assemble the cake a day ahead and chill it overnight. This saves time and lets the coffee and cream flavors fully develop for an even better taste on serving day.
FAQ – Tiramisu Cake
Can I make Tiramisu Cake without alcohol?
Absolutely. Traditional tiramisu sometimes includes coffee liqueur, but for this cake, you can skip it entirely. Just use strong brewed coffee or espresso for full flavor without any alcohol.
What can I use instead of mascarpone cheese?
If mascarpone isn’t available, you can use cream cheese mixed with a little heavy cream to soften the texture. The flavor will be slightly tangier but still delicious.
How long does Tiramisu Cake last in the fridge?
When kept in an airtight container, it stays fresh for 3–4 days, with the flavors becoming even richer after the first day.
Can I use instant coffee instead of brewed coffee?
Yes, but brew it strong. Dissolve 2 tablespoons instant coffee granules in 1 cup hot water for a bold flavor close to espresso.
Is Tiramisu Cake safe for kids?
Yes—just skip any alcohol and make sure the coffee flavor isn’t too intense. Using decaf coffee is also an option.
What’s the difference between Tiramisu Cake and classic tiramisu?
Classic tiramisu uses ladyfingers as the base, while Tiramisu Cake swaps them for sponge cake. This makes it sliceable, a bit fluffier, and perfect for celebrations.
Conclusion – Why This Tiramisu Cake Will Be Your Go-To Dessert Recipe
A Tiramisu Cake isn’t just dessert—it’s a conversation starter, a centerpiece, and a crowd-pleaser all rolled into one. With airy sponge layers, rich mascarpone cream, and that irresistible coffee-cocoa combo, every slice feels like a little trip to Italy. Whether you’re serving it at a family gathering, a dinner party, or as a weekend indulgence, it delivers elegance without being overly complicated. And the best part? You can customize it with your favorite flavors and even make it ahead of time.
Master this recipe once, and you’ll have a signature dessert that never fails to impress.
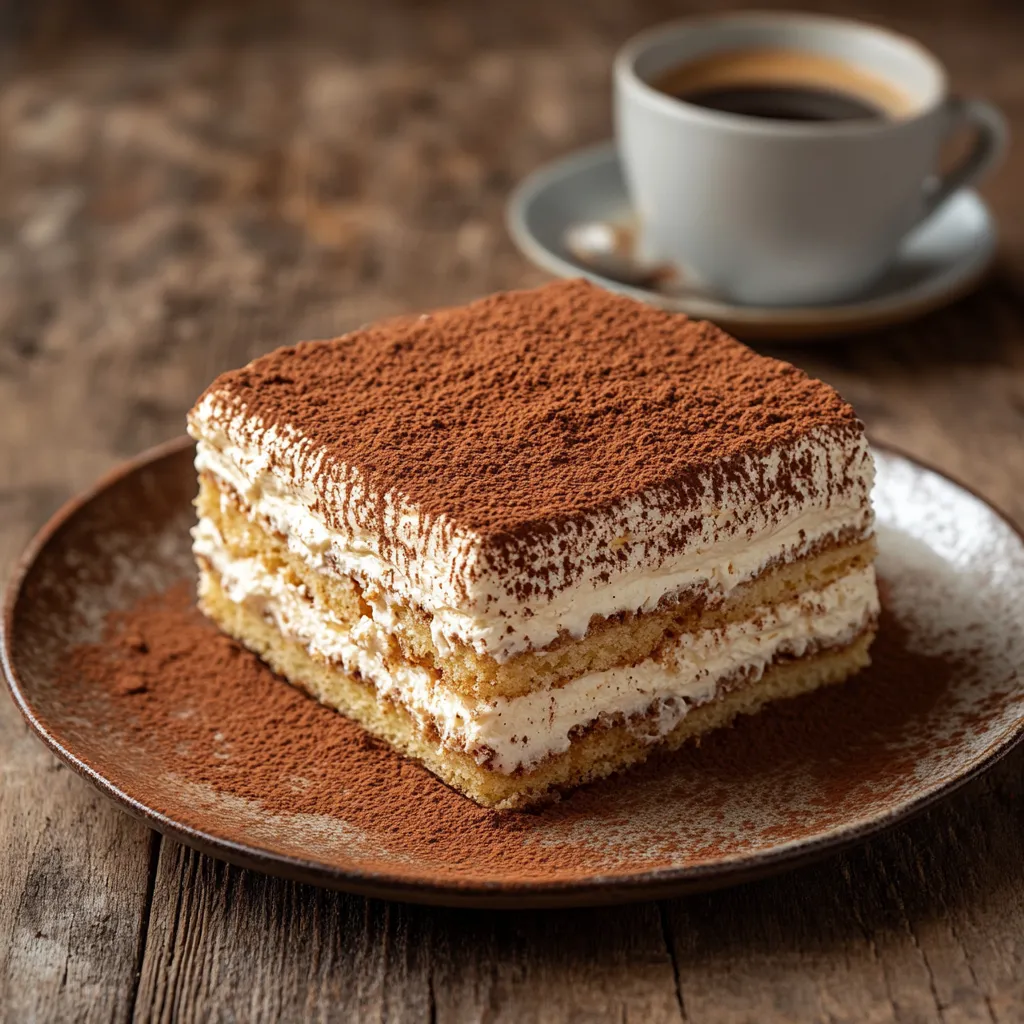
Tiramisu Cake
Ingredients
Equipment
Method
- Prepare Sponge Cake: Preheat oven to 350°F (175°C). Grease and line two 8-inch round cake pans with parchment paper. Beat eggs and sugar until pale and thick, then fold in sifted flour and baking powder. Add milk and vanilla. Divide batter between pans and bake 18–20 minutes, until a toothpick comes out clean. Cool in pans 10 minutes, then on a wire rack until completely cool.
- Make Coffee Soak: Combine brewed coffee, sugar, and vanilla extract. Let cool to room temperature.
- Prepare Mascarpone Cream: Whip heavy cream to soft peaks. In a separate bowl, beat mascarpone and sugar until smooth. Add vanilla and coffee, then fold in whipped cream gently until fluffy and stable.
- Assemble Cake: Place one sponge layer on a plate, brush with coffee soak, spread with mascarpone cream. Brush underside of second sponge with coffee soak, place on top, and cover with remaining cream.
- Finish: Dust generously with cocoa powder. Add chocolate curls if desired.
- Chill: Cover and refrigerate at least 4 hours or overnight before serving for best flavor.
Notes
- For a kid-friendly version, use decaf coffee in the soak.
- Chilling overnight improves flavor and makes slicing cleaner.
- If freezing, wrap slices tightly and thaw in the fridge before serving.


