Making cheese at home might sound like a project reserved for pros, but what if I told you that learning how to make cottage cheese is actually one of the easiest recipes you can master in under 30 minutes? This simple, fuss-free technique uses just three ingredients, one pot, and a bit of patience—and the result? A creamy, tender, and incredibly fresh batch of homemade cottage cheese that easily beats the store-bought kind.
Whether you’re following a high-protein diet, avoiding additives, or simply love real food made from scratch, this step-by-step guide on how to make cottage cheese at home will earn a permanent spot in your kitchen rotation. It’s beginner-friendly, super satisfying, and once you try it, you’ll wonder why you ever bought it pre-made.
Don’t miss our Creamy Cottage Cheese Chocolate Mousse for a dessert twist on this classic ingredient.
Why Homemade Cottage Cheese Is Worth It
The Benefits of Making Cottage Cheese at Home
There’s something undeniably satisfying about turning simple ingredients into something delicious with your own hands. Homemade cottage cheese isn’t just about saving money (though it does)—it’s about control, freshness, and taste.
- No additives or preservatives
- Customizable texture and flavor
- Higher protein and better freshness
- Great for vegetarians and health-conscious eaters
When you make it at home, you’re in charge. Want it creamier? You got it. Prefer it drier and crumbly? Easy.
Homemade vs. Store-Bought: The Real Difference
You might be used to the cold, tangy containers of cottage cheese from your local supermarket—but once you try the homemade version, you’ll never go back.
Here’s how they compare:
| Feature | Homemade Cottage Cheese | Store-Bought Cottage Cheese |
|---|---|---|
| Taste | Fresh, clean, customizable | Often sour or overly tangy |
| Texture | Creamy or dry—you choose | Fixed texture from the brand |
| Additives | None | Often contains stabilizers |
| Cost per serving | Lower | Higher |
| Prep time | 25–30 minutes | Ready-to-eat |
Beyond its taste and texture, the real joy lies in the process itself. It’s simple enough for beginners and requires no special tools or hard-to-find ingredients. Best of all, you probably already have everything in your kitchen to get started.
Ingredients You’ll Need for Making Cottage Cheese
The Simple 3-Ingredient Foundation
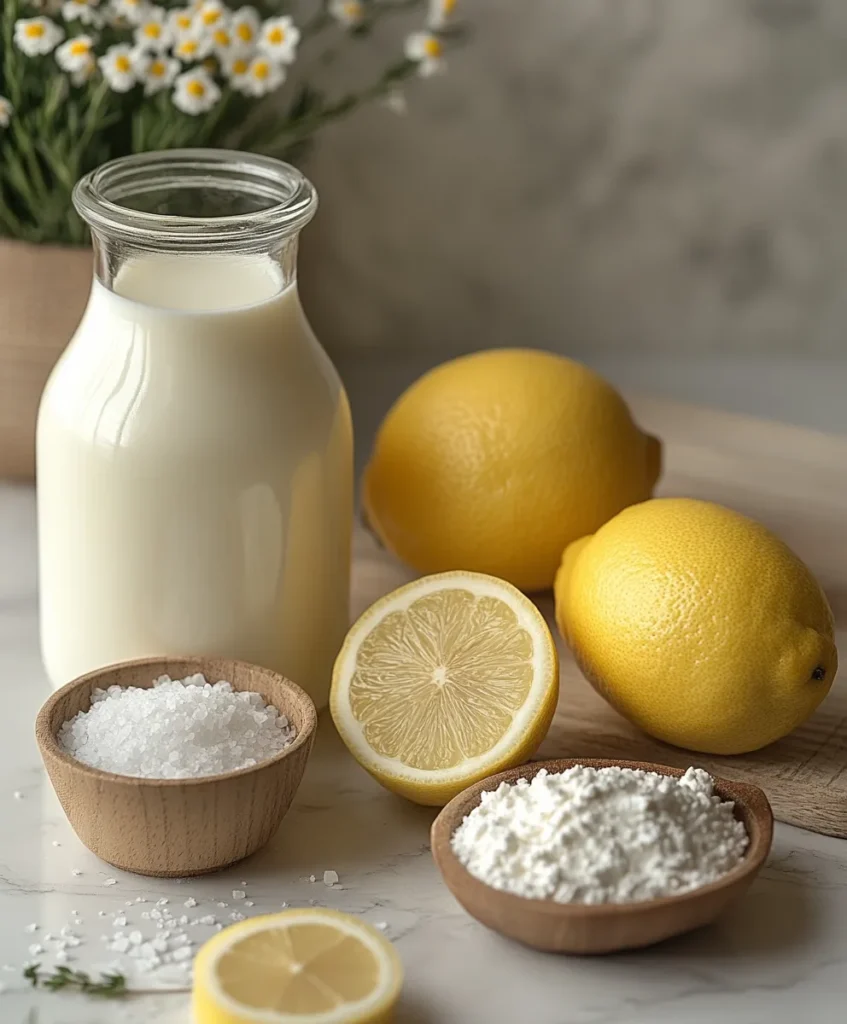
One of the best things about this recipe is how minimal it is. No fancy cultures or hard-to-pronounce additives—just simple, whole ingredients that do all the work naturally. Here’s what you’ll need to make about 2 cups of fresh cottage cheese:
- Whole milk (1 gallon)
The creaminess of your cottage cheese depends on the fat content of the milk. For the best results, use fresh, high-quality milk and avoid ultra-pasteurized varieties. While 2% milk can work, skim milk won’t deliver the right texture for this recipe. - Acid – White vinegar (¼ cup) or fresh lemon juice (⅓ cup)
This is the magic that curdles the milk into cheese. Both work well, though lemon juice gives a slightly fresher flavor, while vinegar yields a milder taste. - Salt (½ to 1 teaspoon)
Optional, but recommended. A pinch of salt brings out the flavor and helps balance the tang.
That’s it—no rennet, no special enzymes, no preservatives. This is real food, plain and simple.
Optional Mix-Ins to Enhance Flavor
Once you’ve nailed the basic cottage cheese recipe, you can start customizing it with a range of optional add-ins. These bring variety and depth depending on your taste preferences or how you plan to serve it.
Here are a few ideas:
| Flavor Direction | Add-Ins |
|---|---|
| Savory | Chopped fresh chives, black pepper, paprika, garlic powder, dried dill |
| Sweet | Honey, cinnamon, maple syrup, vanilla extract, diced fruit |
| Creamier Texture | Stir in a few tablespoons of cream or Greek yogurt after draining |
Adding these elements turns your cottage cheese into a spread, a topping, or even a dip—ready to be used in both sweet and savory meals.
Pro Tip: Always taste as you go when mixing in flavors. Homemade cottage cheese is super absorbent and takes on seasoning quickly.
Equipment Needed to Make Cottage Cheese
The Essential Tools for Making Cottage Cheese
One of the things that makes this recipe so beginner-friendly is that you don’t need any fancy gadgets or specialty tools. Most of what you need is probably already sitting in your kitchen.
Here’s the basic cottage cheese equipment list:
- Heavy-bottom saucepan or pot (3-4 quarts)
This is where the milk will be heated and curdled. A thick-bottomed pot prevents the milk from scorching as it heats slowly. - Slotted spoon or ladle
You’ll use this to gently stir the curds and later transfer them to a strainer. - Fine mesh strainer or colander
This is key for draining the curds from the whey. A fine mesh ensures you don’t lose any of the delicate cheese. - Cheesecloth or a clean thin dish towel
Line your strainer with this to catch the curds and make draining easier. Cheesecloth works best but a clean, lint-free towel is a great backup. - Large bowl
Place the strainer over it to catch the whey (which you can save for other uses like smoothies or baking). - Measuring cups & teaspoons
For accurate measurement of vinegar, lemon juice, and salt.
Smart Substitutes for Home Cooks
Don’t worry if you don’t own cheesecloth or a dedicated strainer. Here are some practical swaps you can use in a pinch:
| Tool | Easy Substitute |
|---|---|
| Cheesecloth | Clean pillowcase, coffee filter, or thin muslin cloth |
| Slotted spoon | Regular spoon with holes or a skimmer |
| Fine mesh strainer | Small colander lined with cloth |
| Heavy pot | Any saucepan that distributes heat evenly |
Tip: Avoid aluminum pots—acid from vinegar or lemon juice can react with it and affect the taste of your cheese.
With just these everyday tools, you’re fully equipped to move into the cheese-making process. Ready to bring it all together? Next, we’ll walk step-by-step through how to turn your milk into rich, creamy cottage cheese from scratch.
Step-by-Step Guide on How to Make Cottage Cheese
Making cottage cheese at home is a beautiful mix of science and comfort. You’re transforming everyday milk into something creamy, tangy, and full of possibilities—all with a little heat and patience.
Here’s how to do it right the first time.
Step 1: Warm the Milk Slowly
- Pour 1 gallon of whole milk into your heavy-bottomed pot.
- Set the burner to medium heat, and warm the milk slowly to about 190°F (88°C).
- Use a cooking thermometer if you have one. If not, keep an eye out for small bubbles forming around the edge—not boiling, just steaming.
Stir gently every few minutes to avoid scalding.
Step 2: Add the Acid
- After the milk reaches the proper temperature, take it off the heat immediately.
- Gently stir in ¼ cup white vinegar or ⅓ cup lemon juice, one tablespoon at a time.
- Stir slowly for 1 minute, then let the mixture sit undisturbed for 10–15 minutes.
The milk will begin to separate into curds and whey—you’ll see white clumps floating in a yellowish liquid.
Don’t panic if it looks strange—that’s exactly what’s supposed to happen!
Step 3: Drain the Curds
- Line a fine mesh strainer or colander with cheesecloth and place it over a large bowl or sink.
- Slowly pour the curdled mixture into the strainer. Let it drain for 5–10 minutes.
Want a creamier cottage cheese? Drain for less time. Prefer it dry and crumbly? Let it sit longer.
Step 4: Rinse and Cool
- Run cold water over the curds in the strainer. This helps rinse off excess acidity and cool the cheese quickly.
- Use your hands or a spoon to gently stir while rinsing, separating the curds.
Step 5: Salt and Stir
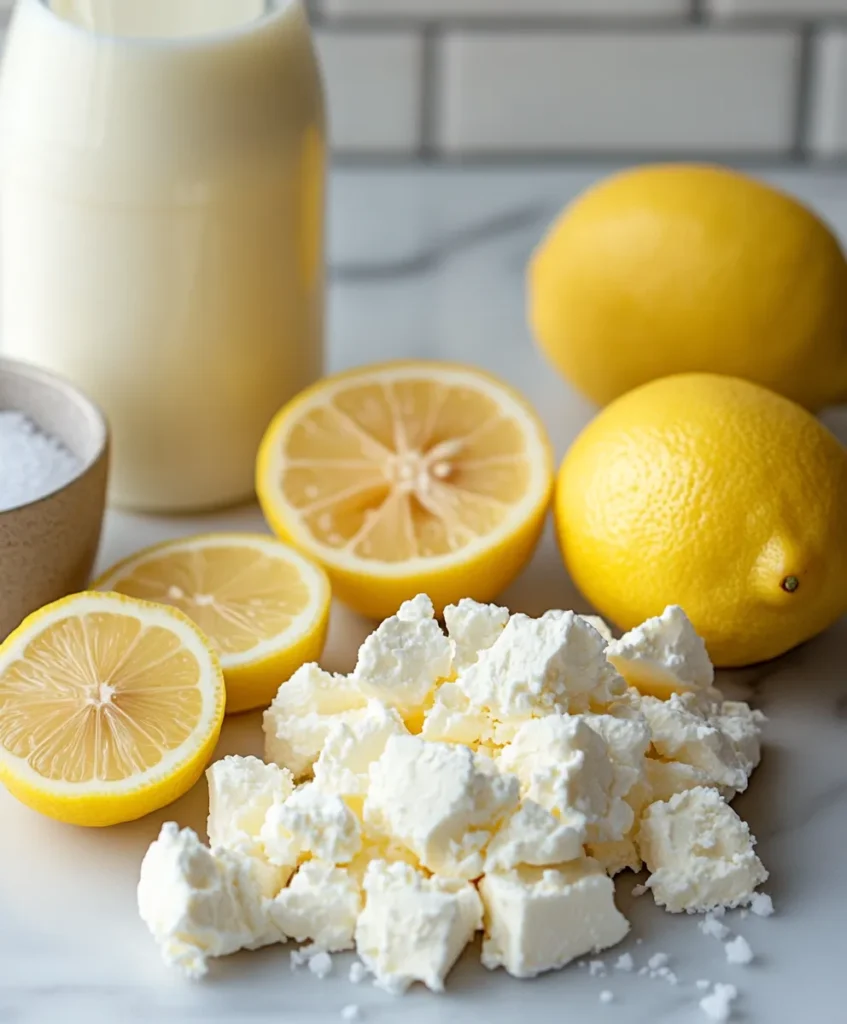
- Transfer the rinsed curds to a bowl.
- Add ½ to 1 teaspoon of salt, depending on your taste.
- If desired, stir in a few spoonfuls of cream or yogurt to enhance creaminess.
And just like that—you’ve made fresh, fluffy cottage cheese.
Looking for inspiration? Try it in our Cottage Cheese Smoothie for a protein-packed breakfast boost.
Bonus Tip: Save the Whey!
Don’t toss that yellowish liquid left behind. Whey is packed with protein and can be reused in:
- Smoothies
- Pancake or bread batter
- Soups and stews
- Marinades
Just store it in a jar in the fridge for up to a week.
Pro Tips from the Kitchen
Avoid These Common Cottage Cheese Mistakes
Even though making cottage cheese at home is simple, there are a few key moments where things can go sideways. Here’s how to avoid the most common pitfalls:
1. Don’t Boil the Milk
Boiling the milk may lead to tough or rubbery curds. For best results, heat it gently to around 190°F (88°C), then remove it from the heat before adding your acid.
2. Be Patient After Adding Acid
The curdling process takes time. Stir gently and then step away. If you rush it, the curds may stay small or not separate fully. Letting it rest undisturbed for 10–15 minutes is key.
3. Drain According to Your Texture Preference
Too much draining = dry and crumbly cheese. Too little = watery results. Start with 5–6 minutes and adjust next time based on your preference.
4. Rinse Gently and Thoroughly
Rinsing under cold water stops the cooking and removes excess acidity. Do it gently to keep your curds soft and fluffy.
5. Season at the End
Adding salt before draining can make your cheese overly salty or interfere with the curdling. Always season after rinsing and draining.
Looking for inspiration? Try our Cottage Cheese Chips Recipe for a high-protein snack that’s low-carb and surprisingly addictive.
Expert Tricks to Level Up Your Cottage Cheese
Once you’ve made a few batches, try these expert-level tweaks to get the exact result you want every time:
✦ For Extra Creaminess
After rinsing and draining, stir in a tablespoon or two of heavy cream, whole milk, or full-fat yogurt. This transforms the curds into a richer, silkier cottage cheese.
✦ For a Slight Tang
Use lemon juice instead of vinegar. It adds a fresh, subtle acidity that complements sweet and savory dishes alike.
✦ Want a Smoother Curd?
Stir a little longer after adding acid. It encourages finer curds and a more delicate texture.
✦ Save the Whey for Zero-Waste Cooking
Whey can be stored and used in:
- Protein smoothies
- Baking (replaces water in pancakes, muffins, etc.)
- Cooking rice or quinoa
- Adding to soups or stews for a nutrient boost
Storage Tips for Homemade Cottage Cheese
How Long Does Homemade Cottage Cheese Last?
Homemade cottage cheese doesn’t contain preservatives like many store-bought versions, so it’s best enjoyed fresh. However, with proper storage, you can enjoy it for up to 5 days.
Here’s a general guideline:
| Storage Method | Shelf Life |
|---|---|
| Refrigerated in airtight container | 4–5 days |
| Stirred with cream or yogurt | 3–4 days |
| Left at room temperature | Not recommended |
For best results, eat it within 2–3 days for peak flavor and texture.
Best Practices for Storing Cottage Cheese
To keep your homemade cheese fresh, safe, and delicious:
✅ Use an Airtight Container
A glass or BPA-free plastic container with a tight lid helps prevent odors from seeping in and moisture from escaping.
✅ Refrigerate Immediately
As soon as your cottage cheese has cooled to room temperature, refrigerate it promptly. Don’t leave it out longer than 1 hour.
✅ Keep It Dry (Unless Adding Cream)
If you prefer drier curds, store them without extra cream. Add cream or yogurt only when serving to extend the shelf life.
✅ Don’t Freeze It
While it’s technically possible to freeze cottage cheese, it will alter the texture. Freezing often results in crumbly, watery curds after thawing—not recommended unless you’re using it for cooked dishes.
How to Tell If It’s Gone Bad
Like any fresh dairy product, it’s important to know when to toss it. Here’s what to look for:
- Sour or off smell
- Slimy or watery texture
- Visible mold
- Change in color
If in doubt, throw it out. Safety always comes first.
Delicious Ways to Use Cottage Cheese

Homemade cottage cheese is endlessly versatile. It’s high in protein, mild in flavor, and pairs beautifully with everything from fruit to roasted vegetables. Whether you want a quick snack or a full meal, here are some mouthwatering ideas for putting your fresh batch to work.
1. Breakfast Ideas: Start the Day Strong
✓ Cottage Cheese Bowl
Top a generous scoop with fresh berries, banana slices, chia seeds, and a drizzle of honey. Sprinkle with granola for crunch.
✓ Protein Pancake Topping
Dollop on top of whole grain pancakes or waffles with a spoonful of maple syrup and cinnamon.
✓ Egg + Cheese Breakfast Wrap
Spread cottage cheese on a tortilla, add scrambled eggs, spinach, and roll it up for a protein-packed breakfast on the go.
Check out these easy Cottage Cheese Egg Bites for a meal prep–friendly way to use your homemade cheese.
2. Lunch & Dinner: Add Creaminess Without the Guilt
✓ Creamy Pasta Sauce
Blend cottage cheese with garlic, lemon juice, and herbs to make a light creamy sauce for pasta or zucchini noodles.
✓ Stuffed Sweet Potatoes
Top baked sweet potatoes with cottage cheese, chopped green onions, and a sprinkle of paprika.
✓ Savory Bowl Builder
Layer cottage cheese into a grain bowl with quinoa, roasted vegetables, avocado, and chickpeas for a filling, balanced meal.
3. Snacks & Dips: Quick Bites with Big Flavor
✓ High-Protein Dip
Mix cottage cheese with salsa, hot sauce, or pesto for an instant veggie dip or cracker spread.
✓ Toast Topper
Spread on whole grain toast and layer with sliced tomato, olive oil, and cracked pepper—or go sweet with almond butter and berries.
✓ Savory Parfait
In a glass, layer cottage cheese with chopped cucumber, cherry tomatoes, and herbs for a Mediterranean-inspired snack.
Discover great ideas like our Cottage Cheese Cookie Dough for a sweet twist that’s still protein-friendly.
4. Baking & Blending: Take It Even Further
✓ In Smoothies
Blend cottage cheese with banana, peanut butter, and cocoa powder for a creamy protein smoothie that tastes like dessert.
✓ In Muffins or Pancakes
Add to your batter for an extra boost of moisture and protein—no one will guess your secret ingredient.
✓ In Cheesecakes or Mousse
Blend it smooth and use in place of cream cheese or ricotta for a lighter version of your favorite desserts.
FAQs – How to Make Cottage Cheese
What is cottage cheese made of?
Cottage cheese is created by curdling milk with an acid like lemon juice or vinegar. This process separates the milk into solid curds and liquid whey. After separation, the curds are drained, rinsed, and optionally seasoned. With just a few ingredients, it’s one of the simplest cheeses you can make at home.
How long does it take to make cottage cheese at home?
From start to finish, the entire process takes about 25–30 minutes. The longest step is waiting 10–15 minutes for the milk to fully curdle after adding the acid. Once drained and seasoned, your cottage cheese is ready to eat!
Can I use lemon juice instead of vinegar to make cottage cheese?
Yes, absolutely. Lemon juice is a natural alternative to white vinegar and works just as well to curdle the milk. It gives the cheese a slightly tangier, citrusy flavor, which many people prefer. Just make sure the lemon juice is fresh and strain out any seeds before using.
Is homemade cottage cheese healthy?
Yes! Homemade cottage cheese is rich in protein, calcium, and essential nutrients, with none of the additives, gums, or preservatives often found in commercial versions. You also control the salt and fat content, making it suitable for low-sodium, high-protein, or clean eating diets.
What milk is best for making cottage cheese?
Whole milk is ideal for the creamiest, richest cottage cheese. However, you can also use 2% or raw milk. Avoid ultra-pasteurized milk, as it doesn’t curdle as effectively. Non-dairy milk alternatives (like almond or oat milk) won’t work for traditional cottage cheese.
Can I make it without rennet?
Yes! This recipe is completely rennet-free, using just acid (vinegar or lemon juice) to separate the curds and whey. Rennet is typically used in firmer cheeses like cheddar, but it’s not required for cottage cheese.
Conclusion: Try It Once, and You’ll Make It Weekly
Now that you’ve seen just how easy and satisfying it is to make cottage cheese at home, you’ll never want to settle for store-bought again. With just three ingredients and a bit of your time, you get a protein-rich, fresh, and versatile dairy product that works in everything from smoothies to savory bowls.
Plus, you control what goes in—no weird preservatives, gums, or extra salt. Just clean, delicious curds, made in your kitchen. Give it a try and share your twist in the comments!
Looking for more homemade ideas? Don’t miss our guide on how to make a Greek Yogurt Bagel Recipe—another high-protein, flour-free favorite that pairs beautifully with cottage cheese!

How to Make Cottage Cheese
Ingredients
Equipment
Method
- Pour milk into a heavy-bottomed pot and gently heat to 190°F (88°C), stirring occasionally.
- Remove the pot from heat. Slowly stir in vinegar or lemon juice. Let sit undisturbed for 10–15 minutes to allow curds to form.
- Line a fine mesh strainer with cheesecloth and place over a large bowl. Pour the curdled milk into the strainer and let it drain for 5–10 minutes.
- Rinse the curds under cold water while gently stirring to cool and remove acidity.
- Transfer curds to a bowl. Add salt and, if desired, mix in cream or yogurt for extra creaminess.
- Serve immediately or refrigerate in an airtight container for up to 5 days.
Notes
- For a milder flavor, use white vinegar. For a citrusy finish, go with lemon juice.
- Avoid boiling the milk to prevent tough curds. Heat gently for best results.
- You can reuse the whey in baking, smoothies, or soups.


