
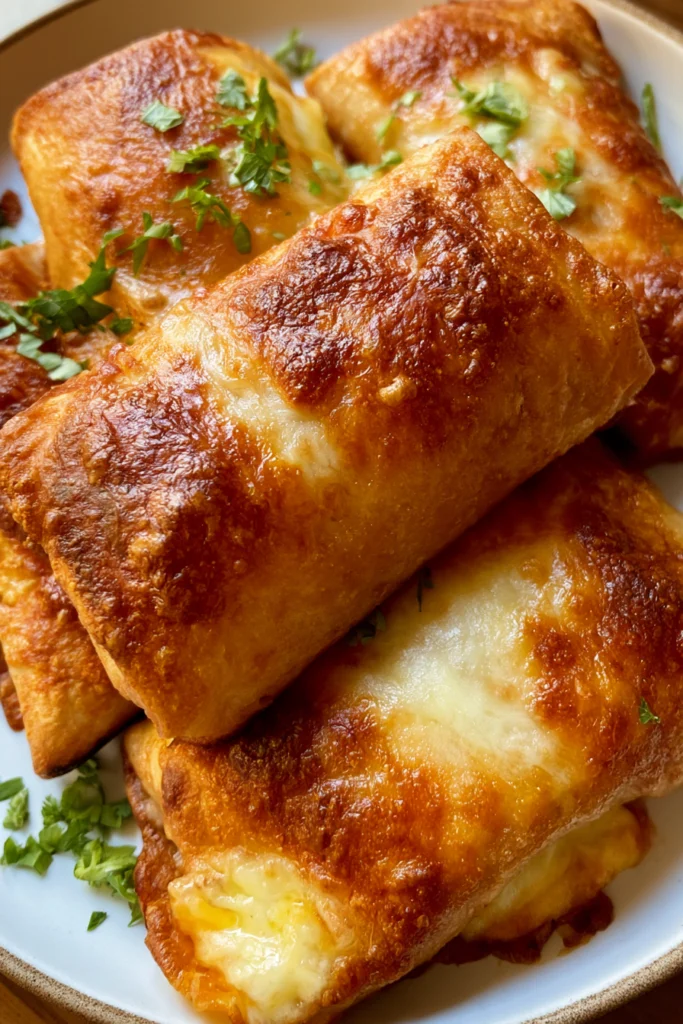
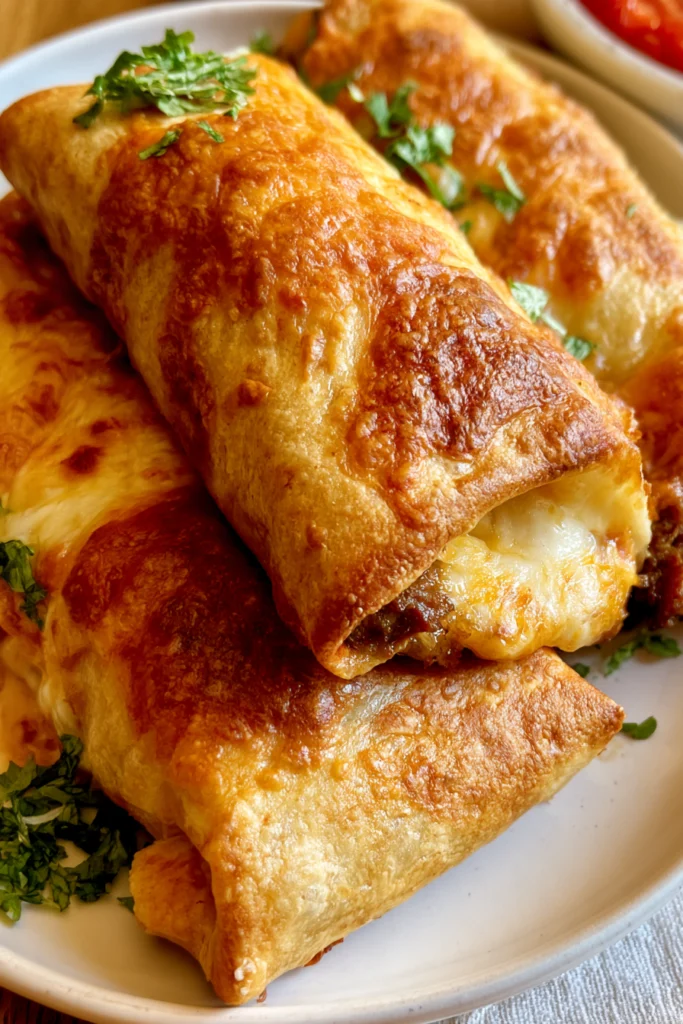
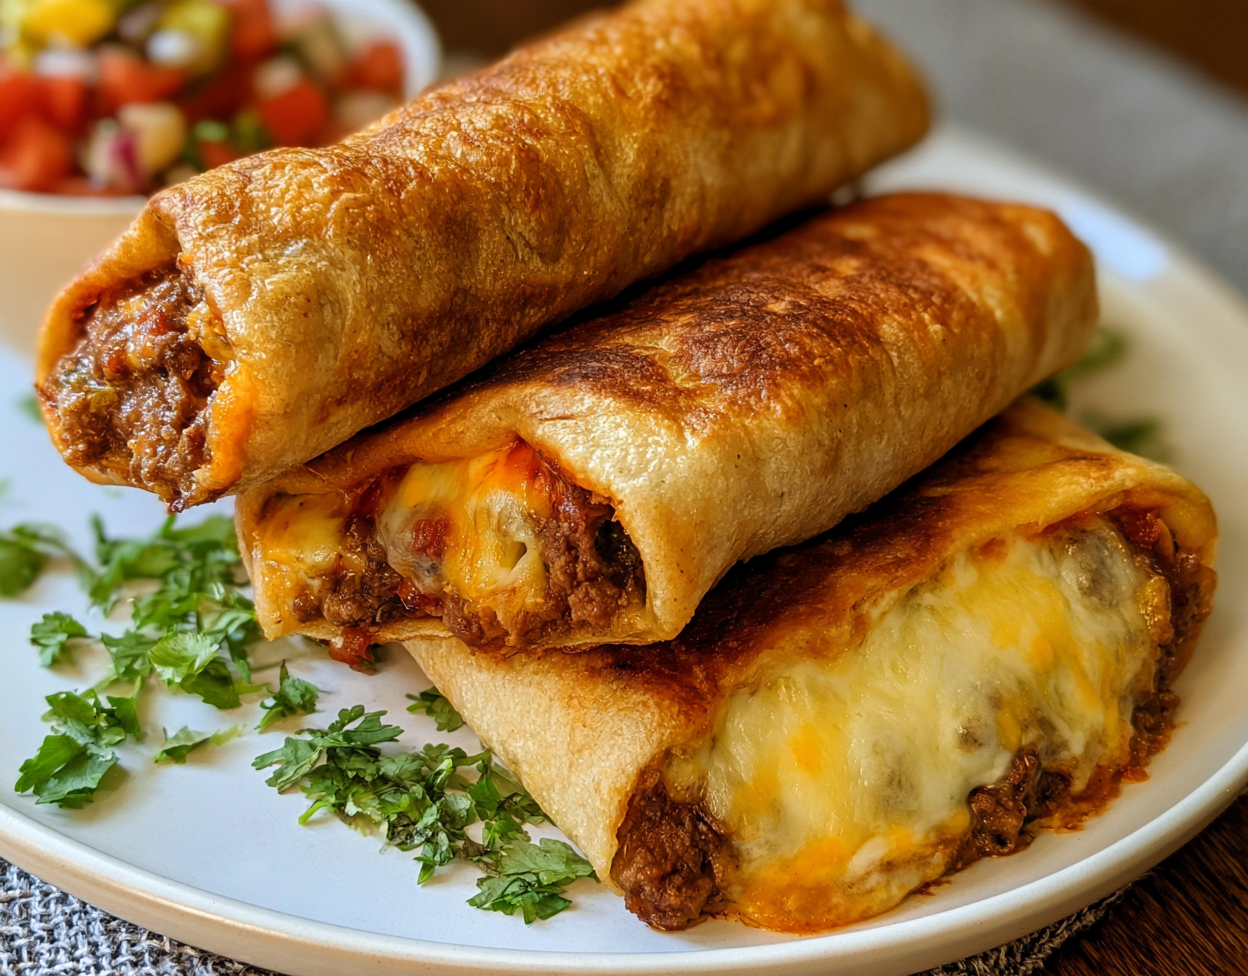
These beef and cheese chimichangas have everything I want in a good chimichanga: a crisp, golden tortilla wrapped around seasoned ground beef, creamy refried beans, rice, and plenty of melted cheese. Frying gives the flour tortillas a crisp shell while keeping the filling hot and hearty inside.
The filling comes together without much fuss. You’ll brown the beef, season it well, and cook it until the extra moisture is gone before layering it with the beans, rice, and cheese. A snug burrito-style fold keeps everything tucked inside, and frying the chimichangas seam-side down first helps them stay closed as they crisp.
These chimichangas are best served straight from the pan, while the tortilla is still crisp, the cheese is melted, and the savory beef and bean filling is warm. Frying is the primary cooking method for this beef and cheese chimichangas recipe, though you can also use the oven or air fryer for a lighter option that requires less hands-on cooking.
Table of Contents
Ingredient Notes
These are the ingredients where a little extra detail can make a noticeable difference in the finished chimichangas.
Ground Beef and Seasonings
Use ground beef with enough fat to stay flavorful as it browns, such as 85/15. Once cooked, drain off the excess grease so it doesn’t make the filling oily or soften the tortillas.
The beef gets its warm, savory flavor from chili powder, cumin, oregano, garlic, seasoned salt, and black pepper. A little water helps distribute those seasonings through the meat as it cooks.
Cheese
Choose a cheese that melts easily, such as cheddar, Monterey Jack, or a Mexican-style cheese blend. I prefer shredding it from a block when possible because it tends to melt more smoothly inside the hot filling.
Rice and Refried Beans
Use cooked, seasoned rice rather than plain rice so it contributes flavor instead of simply adding bulk. The rice should be fairly dry and fluffy, not wet or freshly steaming.
Refried pinto beans add a creamy layer that also helps hold the filling together. If your beans are very thick, warm them briefly so they’re easier to spread without tearing the tortilla.
Flour Tortillas
Large, burrito-size flour tortillas give you enough room for the beef, beans, rice, and cheese while still leaving space to fold in the sides. Fresh, soft tortillas are easiest to roll and less likely to split during frying.
How to Make Beef and Cheese Chimichangas
Cook the Beef Filling
- Brown the beef: Place the ground beef in a large skillet over medium heat. Break it into small pieces as it cooks and continue cooking until no pink remains. Drain away any excess grease.
- Season the filling: Put the beef back into the skillet, then add the chili powder, seasoned salt, cumin, black pepper, garlic, oregano, and water. Stir until the seasonings are evenly mixed throughout the beef.
- Cook off the moisture. Continue cooking over medium heat, stirring occasionally, until the water has been absorbed and the beef looks moist but not wet. You don’t want liquid pooling in the skillet, since a wet filling can make the tortillas soggy.
Fill and Fold the Chimichangas
- Prepare the fillings: Arrange the large flour tortillas with the refried beans, seasoned rice, cooked beef, and shredded cheese. If the tortillas are a little stiff, warm them briefly until they become flexible enough to fold.
- Layer the filling. Spread refried beans near the center of each tortilla, leaving plenty of bare tortilla around the edges. Add rice, seasoned beef, and shredded cheese. Keep the filling compact rather than spreading it from edge to edge.
- Fold securely: Bring both sides of the tortilla in toward the center, then lift the bottom edge up and over the filling. Roll it forward tightly to enclose the filling completely. Place each finished chimichanga seam-side down while you assemble the remaining ones.
Fry Until Golden and Crisp
- Heat the oil. Pour the vegetable oil into a sturdy, deep-sided skillet and heat it over medium-high heat.
- Start seam-side down. Carefully place the chimichangas in the hot oil with the seam facing down. Don’t crowd the skillet; fry them in batches if necessary.
- Fry until crisp: Turn the chimichangas as necessary so they brown evenly on all sides. They’re done when the tortillas are crisp and evenly golden brown, the cheese has melted, and the filling is hot throughout.
- Drain before serving. Carefully lift the chimichangas from the oil and let the excess oil drain away. Serve while they’re still hot and crisp.
Oven and Air Fryer Methods
Frying creates the classic crispy shell chimichangas are known for, but the oven or air fryer can also give you good results while using less oil.
Oven-Baked Chimichangas
Lightly brush or spray the assembled chimichangas with oil, then place them seam-side down on a baking sheet. Bake at 400°F for about 20 to 25 minutes, turning them halfway through to help both sides brown.
The chimichangas are done when the tortillas are crisp and browned and the filling is hot in the center. Baked chimichangas will still be crunchy, though the texture won’t be quite the same as the fried version.
Air Fryer Chimichangas
Lightly brush or spray the outside of each assembled chimichanga with oil. Arrange them seam-side down in a single layer in the air-fryer basket, leaving enough room between each one for the hot air to circulate.
Air fry at 375°F for about 8 to 12 minutes, turning them halfway through cooking. They’re ready when the tortillas are crisp and golden and the filling is heated through. Depending on the size of your air fryer, you may need to cook the chimichangas in batches.
Tips for the Best Chimichangas
- Keep your tortillas covered while assembling. A clean kitchen towel helps prevent them from drying out while you work, especially if you’re filling all six at once.
- Give the oil time to recover between batches. Adding several cool chimichangas lowers the oil temperature. Let it heat back up before adding the next batch so the tortillas fry quickly instead of soaking up extra oil.
- Don’t stack them after frying. Freshly fried chimichangas give off steam, which can soften the crispy tortillas when they’re piled together. Let them drain in a single layer instead.
- Serve them soon after frying. For the best texture, enjoy the chimichangas while the tortillas are still crisp and the cheese inside is warm and melted.
Variations and Substitutions
Try a Different Cheese
Cheddar works well, but you can use Monterey Jack, pepper Jack, or a Mexican-style cheese blend instead. Pepper Jack adds a little heat, while Monterey Jack gives you a mild flavor and especially creamy melt.
Swap the Beans or Add Chiles
The refried beans are part of the main filling, but you can change the flavor by using refried black beans in their place. For extra heat, add a small amount of diced green chiles or jalapeños to the beef mixture. Drain them well first so they don’t add unnecessary moisture.
Make Vegetarian Chimichangas
For a meatless version, leave out the ground beef and increase the beans, or use a combination of refried beans and well-drained black beans. Season the filling with the same chili powder, cumin, garlic, and oregano so you don’t lose the savory flavor that normally comes from the seasoned beef.
Keep the vegetarian filling thick rather than saucy. You should be able to spoon it onto the tortilla without liquid running around the edges; that makes the chimichangas much easier to fold and crisp.
What to Serve With Chimichangas
Beef and cheese chimichangas are hearty enough to serve as a meal on their own, so I prefer pairing them with fresh or simple sides that keep the plate from feeling too heavy.
- Mexican-style rice: A natural choice when you want to turn the chimichangas into a full dinner.
- Refried or seasoned beans: Serve a small portion on the side for an extra-hearty meal.
- Mexican street corn: Its creamy, tangy flavor makes a flavorful side for crispy chimichangas.
- Pico de gallo or salsa: The fresh tomato flavor and acidity balance the rich, fried tortilla.
- Guacamole: Creamy avocado works especially well against the crunchy exterior.
- Sour cream: A cool spoonful is a simple contrast to the warm, seasoned beef filling.
- Fresh salad or slaw: Crisp lettuce, cabbage, tomatoes, and a bright dressing keep the plate from feeling too heavy.
For serving, you can also top each hot chimichanga with shredded lettuce, chopped tomatoes, salsa, and sour cream, or put the toppings on the table and let everyone add their own.d tomatoes, salsa, and sour cream, or put the toppings on the table and let everyone add their own.
Storage and Reheating
Refrigerating Leftovers
Let leftover chimichangas cool before placing them in an airtight container. Refrigerate them for up to 3 to 4 days. If you’re stacking several, place parchment paper between the layers to keep them from sticking together.
Freezing Chimichangas
For make-ahead meals, you can freeze the assembled chimichangas before frying. Wrap each one tightly, place them in a freezer-safe container or bag, and freeze for up to 3 months.
Thaw them overnight in the refrigerator before frying so the filling can heat through without the tortilla becoming overly dark. You can also freeze cooked chimichangas, although the tortilla won’t retain quite the same texture after reheating.
Best Way to Reheat Them
For the crispiest leftovers, reheat chimichangas in a 375°F oven or air fryer until the outside is crisp and the center is piping hot. An air fryer will generally take about 5 to 8 minutes, while an oven may take 10 to 15 minutes, depending on the size and how cold the chimichangas are.
You can use the microwave when you’re short on time, but the tortilla will soften rather than crisp.
Beef and Cheese Chimichangas FAQ
What is a chimichanga?
A chimichanga is essentially a filled flour tortilla that’s folded into a closed package and fried until golden and crisp. The filling can vary, but this version uses seasoned ground beef, refried beans, rice, and melted cheese.
What is the difference between a burrito and a chimichanga?
The biggest difference is how they’re cooked. A burrito is typically filled, rolled, and served with a soft flour tortilla, while a chimichanga is fried after it’s filled and folded. That extra step creates the crunchy, golden exterior that defines a chimichanga.
Why did my chimichangas turn out soggy?
The usual culprits are a filling that’s too wet or oil that isn’t hot enough. Chimichangas can also soften if they’re stacked while hot because the trapped steam settles on the tortillas. Drain them in a single layer and serve them soon after frying for the best texture.
Why did my chimichangas open while frying?
They may have been overfilled or rolled too loosely. Make sure the sides are tucked in securely and finish rolling with the seam underneath. Placing that seam into the oil first helps set the fold before you turn the chimichanga.
Can I Use Corn Tortillas Instead of Flour Tortillas?
Flour tortillas work best for this recipe because their larger size and flexibility make it easier to wrap the filling securely without tearing. Corn tortillas are usually smaller and tend to crack when folded this way, so they don’t work as a direct replacement for the flour tortillas.
More Recipes You May Like
If you enjoyed these beef and cheese chimichangas, try one of these easy recipes next:
Beef and Cheese Chimichangas
Ingredients
Method
- Cook the ground beef in a large skillet over medium heat, breaking it into crumbles, until no pink remains. Drain the excess grease.
- Return the beef to the skillet. Add the chili powder, seasoned salt, cumin, black pepper, garlic, oregano, and water. Cook, stirring occasionally, until the water has been absorbed.
- Set out the tortillas, refried beans, rice, beef, and cheese. Warm the tortillas briefly if needed to make them flexible.
- Spread refried beans near the center of each tortilla. Top with rice, seasoned beef, and shredded cheese.
- Fold in the sides, bring the bottom of the tortilla over the filling, and roll snugly into a closed package.
- Heat the vegetable oil in a deep-sided skillet over medium-high heat.
- Carefully add the chimichangas seam-side down, working in batches as needed. Turn them as they cook until the tortillas are evenly golden and crisp.
- Remove the chimichangas from the oil and drain well before serving.